Thursday, June 30, 2011

{Thrift Store Thursday} Leftovers from Last Week

I found these items last week and I'm just dying to refashion the pink and yellow pieces a bit. I think my and me madre' are going to work together on this, right mom?

Anyway, I'm confident I will find more photo worthy items this afternoon at the New Image Thrift Store, but I didn't want to keep anyone waiting...more to come!

Pink Blouse: $1.00 (to be refashioned)
Yellow Pushers: $1.00 (to be refashioned)
Circular Scarf: $1.00
Photobucket


Black and White Polka-Dot Halter Dress (belt not shown): $1.00
Photobucket

Wednesday, June 29, 2011

{Victorian Home} Master Bedroom

Leaving off from last week's Master Bedroom Nook, I bring you the rest of the Master Bedroom in my parent's beautifully restored Victorian Home.

My mom is such a thrifty shopper. The bedspread and pillow on the right on this master bed were thrifted. The Eastlake Head/Footboard were found as part of the three-piece set in this room at an antique shop in Okoboji, Iowa. Isn't it beautiful (in spite of the poor photo)?
Photobucket
Photobucket

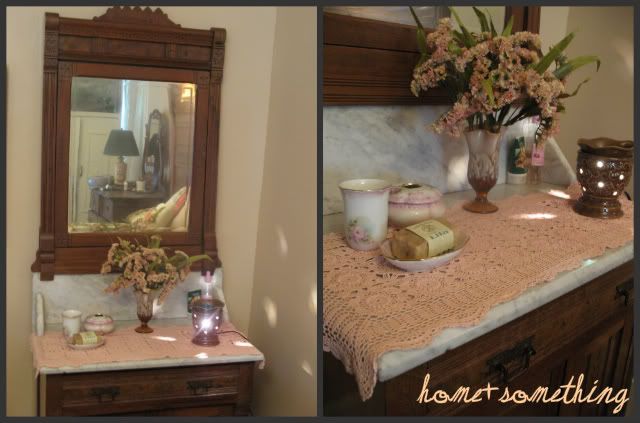
I love how almost every piece has a story. The third piece in the East Lake set: lady's dresser adorned with a three-piece vanity set gifted by my grandmother, homemade soap named after my mom once sold at my brick & mortar, "The Funky Junk Storehouse," a thrifted vase, and a Scentsy pot.
Photobucket

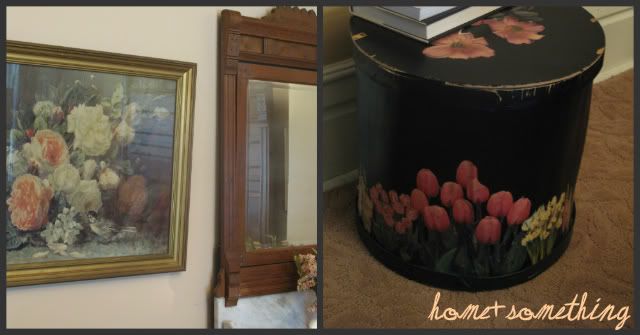
To the left of the lady's dresser, an antique picture with a large wooden cylinder storage container with lid below decoupaged and painted as a gift from my grandmother, Vi.
Photobucket

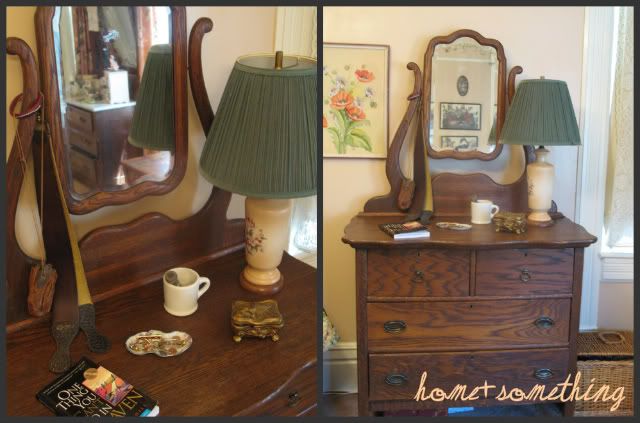
To the right of the bed, the Master's Dresser, a family heirloom belonging to my Grandfather, Lloyd. Lovely thrifted items include leather shaving straps, shaving mug and brush.
Photobucket

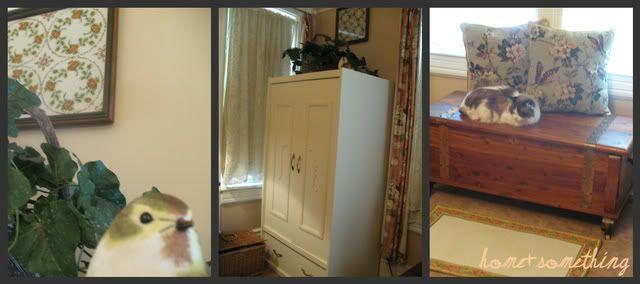
The South wall: A replica armoire serves as a closet for my dad, on the wall is a beautiful cross stitch picture made by my grandmother. The cedar chest belonged to my mother's "Grandma Mossum", her kitty Leira joins the photoshoot. Pink floral curtains are thrifted.
Photobucket

At the foot of the bed, a footstool saved from an auction of her friend, Nancy Flemming. Many thrifted items on this antique end table. A beautiful antique chandelier.
Photobucket

Exterior Paint House Renovation

I'm loving this Color Visualizer on the Sherwin Williams website. Although they don't have exactly the style of house/church we own, I picked the one that I thought would most closely exhibit how the color scheme would look on our house.

I have some issues with this house. For one thing, for the most part three of the four sides will basically be one main color and a trim....soooo, I really have to like the main color and trim. The accent color will look nice on the front/corner, but driving up to it from all other angles must make me go "ahhhh, I love that color" everytime I see it. I'm just like that I guess.

Photobucket

I like the crispness that comes with a nice white-ish trim, but I like the traditional darker trim used for older houses, esp. painted ladies.

The shingles are gray as pictured, so the colors have to go with those. And I want the door to contrastingly blend (I think I made that up).

With those items in mind, would you PLEASE take a moment and VOTE for the color scheme you think we should paint our house? I wish I had some fun giveaway or link-up, but I've really just got to get this done and the fun system of picking would require hours of figuring out how to pull one of those things off! PLEASE, even if you've never come out and commented before...lurkers...just leave a number of your choice. Thanks everyone!
Photobucket
Photobucket
Photobucket

About #6. That is for my babe. He really wants to paint it the most annoying colors possible...cuz he's like that. It is growing on me. YIKES!

Tuesday, June 28, 2011

No PhD Needed to Reach Out

An old friend of mine once told me I could have as many if not more opportunities to reach out to people without having a degree as I could if I pursued a degree in say, counseling.

I was one day away from enrolling as my babe and I listed out the pros and cons (something we always do when being faced with life-changing decisions) of taking classes while he finished his degree in Preaching and Evangelism.

It seemed that every wife on campus was picking up some classes, and it was the perfect time (living on campus and all).

As we listed the pros and cons, it became clear that pursuing a degree was just not at the top of God's priority list for us at that time.

My friend's encouraging words confirmed it in my soul.

Those timely spoken words have proven themselves time and again. Our family has had countless opportunities to "reach out" to many people who may never consider a visit to a counseling office in a conventional way.

We've never pursued adoption or foster parenting. I can't speak for my babe, but I attribute it to a "knowing" that we wouldn't meet the criteria any agency would expect of a family wanting to love a child. Maybe we wouldn't be able to handle the "stress" of home visits and psychological testing.

Don't get the wrong impression. Nothing weird is going on at our house, sometimes things are just a little emotional and chaotic.

I do lose my temper at times, expect my kids to fend for themselves when I'm engrossed in something, demand perfection at times, and just go a little crazy if the house is getting beyond nasty.

My husband gets a little grouchy when he has too much to think about, he expects respect, and is no-nonsense at times. I'm afraid these things might put us out of the running for "Family of the Year."

Regardless of what the rest of the world thinks, God has still found us worthy of helping along a few people here and there. For that I am thankful. Why wait for an agency or degree to dictate whether or not you can reach out? Use your home, talent, passion for each opportunity He brings your way.

We don't have a beautiful or large home, never have. But God has brought many people along who don't seem to care about having their own guestroom or own bathroom for that matter.

This week, we were blessed to have this beautiful girl stay with us while her mom got a little extra care.
Photobucket
post and picture published with permission of her mom
She was happy to sleep in the living room and pick up some chores with our kids. My daughter will always see her as a big sister now. They practiced pitching, played with playdough, and sang karaoke.

God took a worried little girl and put a smile on her face during the storm in her life. And He used an imperfect family to reach out and provide a refuge for her in their home.


Psalm 126:6

The Message (MSG)

...So those who went off with heavy hearts
will come home laughing, with armloads of blessing.

I'm linking up to "A Wise Woman Builds Her Home." Go check it out:

A-Wise-Woman-Builds-Her-Home

Simple Daily Chore Chart

I love, love, love using Excel any chance I get. I'm always making some type of form or schedule. The templates out there never seem to quite work for me, so I end up starting from scratch until I get what I am looking for.

I thought I would post some of my organizational tools here and put them out there for whoever might need to grab a chart.

This chore chart is something I came up with recently for a family that is providing in-home care for their elderly parent that is suffering from Dementia/Alzheimer's.

The family employs several caretakers, so for everyone to be informed about what is being done and what is yet to be done. I took the needs of the family and developed this simple chart to post on the kitchen cabinet for everyone to see and check off as chores are completed.

It would be incredibly easy to customize this chore chart into a list of chores for any family to refer to (please send me a message and I will email you the Excel file). Just change the titles to the chores you need done. You could black out boxes to pick and choose the days certain chores need to be done.

Have fun putting this handy chore chart to use for your family. Let me know how it works for you or what you did to customize it.

Monday, June 27, 2011

Ode to a Great Softball Season

It's been a fun season
Making new friends
Trying new things
Celebrating, Crying.

Swinging at pitches too high
Swinging at pitches too low
Not swinging at the good ones
Making it fly!

Stopping too short at 1st
a few pitches gone wild,
Stealing second
Over-running third
Making it home.

Third and Fourth grade girls
most improved team in the league
proud to help coach
proud to be mom.


Photos courtesy of "Beautiful Disaster Photography"
Photobucket

Tea on the Porch

Photobucket
Our family is blessed with beautiful porched houses. Maybe you've never thought of it, but once you've spent a few mornings or afternoons sipping tea with your family in a comfy wicker chair or porch-swing-for-two, you'll understand what a blessing open porches truly are.
Photobucket
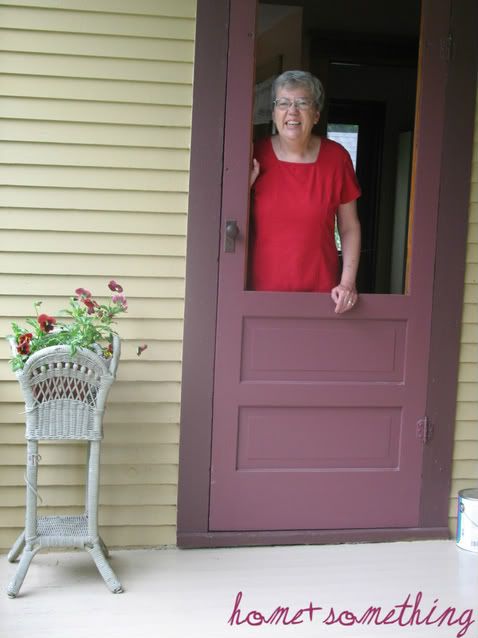
A part of small hometown charm, my Aunt Audrey (shown above in the door that is getting fixed) and Uncle Ron can be found serving up tea, coffee, and maybe even a little something to go with it nearly everyday they are home around 10am and 2pm. Passerby's are always encouraged to stop by.
Photobucket

If a tea party can't be found there, you can usually wrangle up my parents to bring on the tea (especially iced in the summer) on their porch just a block south.
Photobucket
Another thing I love about my Hometown.

Anyone else blessed with enjoying tea on the porch?

Sunday, June 26, 2011

i heart macro {Hosta Tunnel}

Linking up to Studio Waterstone "i heart macro" cuz I truly love close-up pictures...get it from my 94 year-old Granny I guess, whose macro and other photographs were on display for a month at the Sanford Museum.

Here is this week's macro, I caught this Hosta Leaf that looks like a fun tunnel to slide down at my Aunt Audrey's house after a morning rain had come and gone and the sun began to peak out:

Photobucket


studio waterstone

Friday, June 24, 2011

T-Shirt Refashion

My 9 year-old was inspired to try this simple T-Shirt Refashion originally brought to us by Innovative Sewing, who I follow on Twitter. The original tutorial was by CandyCaneCandace on YouTube. Thanks Candace for a great project!

My daughter, Katibree, bought 4 t-shirts for 50 cents a piece at a rummage sale a couple of weeks ago. She's a thrifty shopper!

Now introducing....Katibree Gets Creative {T-shirt Refashion}

Thursday, June 23, 2011

{Thrift Store Thursday}

Oh, I found many a treasure this week. I really think I need to open an online store to get these vintage items out to those who would appreciate them. These vintage items just don't sell here in Smalltown, USA...and I only have so much room!

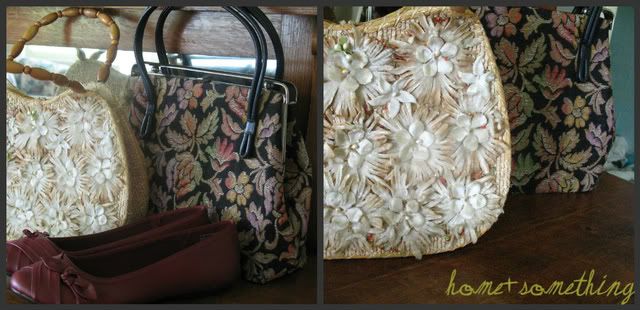
The only items I had time to photograph (need a model for other items) are these two lovely purses ($1.00 each) and a cute little pair of American Eagle Flats ($1.00).
Photobucket
Should I start an auction?

Meet Virginia Design


Wednesday, June 22, 2011

A Church Building and a Series of Events

Photobucket
This is the building we long to someday call HOME or at the very least make it liveable for someone else to call HOME.

It's a funny little story about how we came to own this cute little church building.

This little church has been my church off and on since I was about the age my daughter is now. Through a series of events, including marriage, children, and bible college, our family made this church our church home once again. In fact, my babe started and ended his "formal ministry" as an "Associate/Youth Pastor" in this building and the neighboring building (the little one to the left) aka "The FireEscape."

A couple of years ago, our church congregation was able to purchase the old abandoned high school across the street, leaving this charming old church building vacant. A family from the church at the time bought this old church and "The FireEscape" with plans to make it their home.

After another series of events, the family decided to give the old church building to a single gal who had just graduated from college. After another series of events, the single gal decided to move whereby my visionary husband asked for how much she would like to sell the building.

Within a week, and permission from the original donor family, the building was given to our family for which we only were asked to recoup the gal's expenses of $800 in materials already put into renovating.

Crazy little story, huh? Well, God is like that. We've never owned a home and the first home we own, we REALLY own. Within 2 months, we also completed a debt repayment program a year early.

We continue to live debt-free with the exception of student loans. We don't drive the nicest vehicles and we don't charge vacations on credit cards, but I continue to have the ability to stay home with my kids and live debt-free....something I remind myself whenever I have a pity-party over my wardrobe choices.

ANYWAY, one of the first orders of business for this eye sore on the corner of the block, is PAINT. I happen to know a little about how to go about that!

Coming up with a color scheme, however, is becoming an overwhelming task. Just when I thought I had it figured out, I noticed the two houses to the north were too close to being the same color. Back to the drawing board.
Photobucket
Any ideas? It has to include at least 4 colors.

Tuesday, June 21, 2011

Victorian Home - Master Bedroom Nook

Each week I will be featuring snippets from my parent's charming Victorian Home they began restoring aound 20 years ago.

The home had been what historical renovators refer to as "remuddled" prior to their taking back this old "Steamboat" style Victorian. Built in 1896, the home has undergone several changes over the years including the installation of blue shag carpet, removal of walls and pass-through dining cabinets, and enclosure of the back porch to add a half bath.

I was a freshman in high school when my parents took on this giant house, leaving behind the open, private farmhouse that I now have the honor of living in once again (a story for another day).

I have story upon story (as do my parents), about the process of bringing "The Patterson House" back to her full beauty, including all of the friends and family who participated in everything from large renovations to small details.

My mom is an A-mazing decorator. She has changed the decor style in this home from Victorian to more Cottage in the last few years. She has a real talent for thrifting, sewing, and stenciling among other things. No degree in Interior Design, a homemaker most of her life, prepare to be amazed!

This week's feature is a corner of the Master Bedroom.
Photobucket
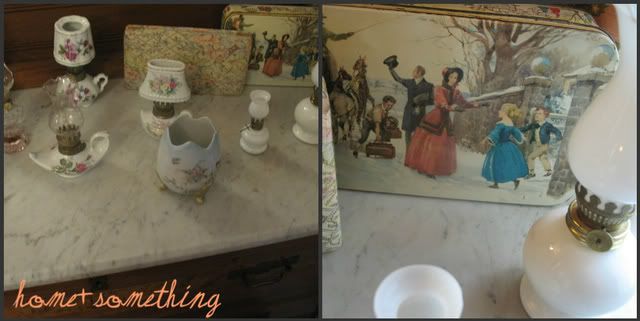
This marble top dresser is one of several "Eastlake" pieces in the home which matches the "Eastlake" woodwork in the home.
Photobucket
A sweet little finger lamp collection with a vintage biscuit tin propped in the background:
Photobucket
A Maud Humphrey Bogart, undoubtedly a gift from my 95 year-old grandma.
Photobucket
Jewelry Armoire, vintage pictures and pillows:
Photobucket
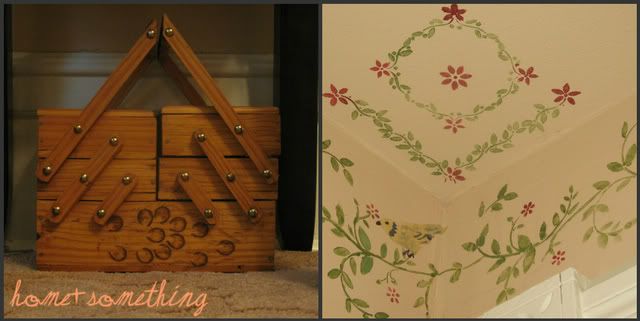
I love the attention to detail, I've got to find out the story behind this woodburnt piece, the stenciling on border and ceiling is all my mom:
Photobucket
Isn't this a beautiful HOME?


Monday, June 20, 2011

Kwick & Kolorful Kauliflower Sidedish

I found this delicious and quick recipe awhile back and finally got around to using it.

I could't pass up this colorful purple variety of cauliflower (regular colored cauliflower can be used) I found at the grocery store.

Photobucket
Ingredients:

1 Head Cauliflower
2 Cloves Garlic
1 Tbs Coconut Oil
1 tsp Nutmeg
S&P to taste

Directions:

1. Preheat Oven to 400 degrees.

2. Seperate Cauliflower Head into individual bunches, rinse nd set aside.

3. Heat Coconut Oil in skillet over Medium/High Heat until melted.

4. Add Cauliflower to skillet,coating with melted Coconut Oil.

5. Squeeze juice from lemon over cauliflower, slice lemon in half and
place flesh side down in skillet.

6. Add Nutmeg, Salt and Pepper.

7. Stir over heat and when Cauliflower begins to brown a bit, add pressed garlic. Saute until garlic browns but doesn't burn.

8. Remove from heat and place in a greased (olive or coconut spray) baking dish.

9. Bake for approximately 30 minutes or until Cauliflower is tender enough for a fork to easily insert.

Serve with anything and enjoy a Home Cooked meal!!

Painting Tools of the Trade

Take it from someone who has been painting off and on every summer since I was about 9 years old. When it comes to painting, inside or out (interior or exterior), there are some "Tools of the Trade" that will make your job a WHOLE LOT easier.

I've done several interior jobs, I prefer exterior...probably because you can be a bit messier without consequence.

PLEASE, if you're going to paint that house of yours yourself, take my advice and get yourself some tools (or borrow if you can):

Paintbrushes:
You absolutely CANNOT buy one of those cheap brushes at Wal-Mart. Buy yourself a couple of really good brushes, clean them well, and use them the rest of your life (if you're not painting several houses per year). On our crew, a Wooster is the envied brush. My dad hides his until he's ready to dip-in so no one "accidently" grabs it.

I recommend a couple of 3-4 inch flat brush (one for primer, one for paint) and a 1 1/2 - 2 inch angle brush (for trim).

Wire Brush
This will be used at the end of each day to clean that $30 brush you just bought.

Ice Cream Buckets
Depending on how many colors and how many people will be painting, start saving and have several on hand to pour your paint into.

Bucket Hooks
A fancy wire hook that goes on your bucket hook so you can hang the bucket off of your ladder. You can also use a wire handle from a left-over paint can.

Ladders
The reason most people hire it done. You will need a good 5 rung step ladder and at least one size of aluminum extension ladder. For high peaks, you may need an additional size (I've seen some people rent boom trucks).

Stand-Off
This is a must-have attachment for your extension ladder. It props the ladder off of the house and gives you stability. It allows you to prop on window frames for hard to reach areas.

Drop Cloths
Dont' spend a bunch of money on those plastic or canvas cloths at the Hardware Store. Raid your closet and donate an old sheet or blanket to the cause. Otherwise check-out your local thrift store and buy a cheap blanket or two.

Paint Can Opener
You can buy a little tool just for this job for about 44 cents, or just use a flat-head screwdriver, a butter knife, flat rock...desperate times call for desperate measures. Nothing like being ready to paint and not being able to open the can!

Scraper
The very first tool you will need. Don't forget to scrape! I prefer one that does not have a moving head and has a scraping edge on both sides. In this case, bigger is not necessarily better. That thing will get heavy in your hand real quick!

Razor Blade
To get paint off the windows, nearly impossible to avoid.

Photobucket

Rags & Water
Spills are unavoidable. Have a few rags handy next to a bottle of water so you can wet the rag. Act quickly, paint dries faster than you would think. If you spill on a sidewalk, flush it with as much water as you can quickly.

Plastic Bags
To wrap wet paintbrushes or buckets with paint in them while you're on break or using a different color. This will keep everything from drying out. Place them in the shade.

Spray Paint that matches shingle color
Ideally you will have drop cloths on your roof, but just in case you need to cover up a paint splatter, a light coat of spray paint does the job.

Sunscreen or other Sun Protection
Ideally you will work with the sun and stay in the shade as you make your way around the house, but if you have to be in the sun, it won't take long to develop a good burn. Sunglasses are a must if painting in the sun, the glare from the house will nearly blind you.

Wasp Spray
Wasp nests lurk in many places especially under eaves. You don't want to be caught up on a ladder dodging a stinger!

Bug Spray
Again, on a ladder getting bit by flies, gnats, or mosquitos is not a good idea!

Safety Goggles
To keep paint chips out of your eyes. Many times you will be scraping above your head. Trust me, paint chips HURT, really BAD!

Head Covering
Not the religious type, a handkerchief or old baseball cap will do. Without it, you'll be digging paint chips out of your scalp for days and picking dry paint out like monkeys picking lice for quite some time.

Primer
A primer with stainblocker is best. And only enough to prime over bare wood after you've scraped.

Paint (of course)
I have a few favorite brands including Benjamin Moore (my parents preference especially for historical colors), Diamond Vogel, and most recently I've added Valspar (available at Lowe's. There really is a difference from a painter's stand-point. They are nice and thick, cover well, and brush on smooth without dripping everywhere. They are yummy. Evidently they last longer too.

Regular Breaks!
Okay, not really a "tool" so-to-speak. But without them, you will wear out quickly. Don't try to set records. Take a break every couple of hours and stay hydrated.

Did I forget anything? I can't wait to hear how your house painting goes!

Sunday, June 19, 2011

I Heart Macro

Photobucket

studio waterstone

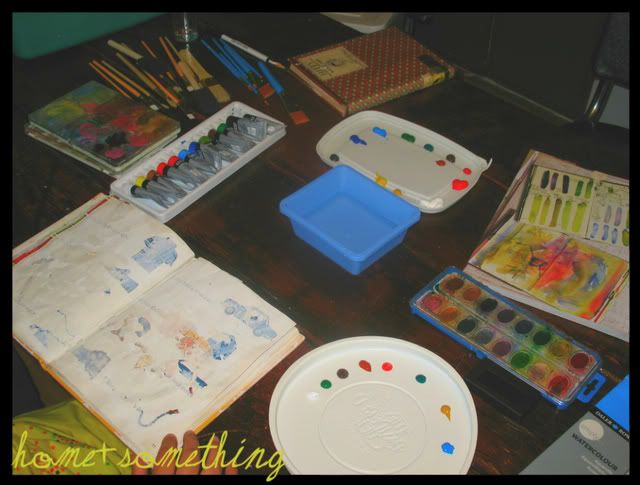
Art Journal: Experimenting with Watercolor

Photobucket

Our Assignment for this week was to take a two-page blank spread and begin experimenting with watercolor paints and different sizes and types of brushes.

Photobucket

Easy. Relaxing. Saturday at HOME.

Photobucket

Saturday, June 18, 2011

Poodle Cut Before & After

One of our HOME-eez is our Poodle Schnauzer(?) aka Schnoodle aka Mutt. His name is "OSCAR" and he's a fabulous rescue dog.

We've searched for the perfect dog over the last few years, trying out several including
a Bulldog (he came with some aggressive behaviors),
a Weimaraner (came with seizures that eventually ended his life),
a Hound Dog (that ate a sock, a bird, and a marble the first and last day we had him),
a Maltepoo (that my mother-in-law decided to take back)
...and NOW--->OSCAR, who fell into our lives and won over our hearts when we decided to meet with him in the "Visiting Room" at the local Humane Society.

He came into our lives in February, freshly shaven and ready to love everyone in the family equally.

With summer here, we decided it was time to give him a fancy poodle cut. What do you think?

Photobucket

We think he is so incredibly handsome. They even gave him eyelashes (can't quite see them in the photos). Thanks to "Fancy Paws Pet Styling" for an amazing cut & groom! They sent us text pictures throughout the process. How thoughtful!
Friday, June 17, 2011

Bubba Logic: Celebrity Slang

This week's Bubba Logic from my 12-year old (aka Bubba):
Photobucket

This week's logic is more a language than logic. But it does make logical sense. He's been creating his own celebrity slang:

"Schwarzeneggers" aka "Shorts"

I need to put on some Schwarzeneggers for basketball practice.
"Shaquille O'Neill" aka "Shack"
I need to get some batteries at Radio Shaquille O'Neill.
"Keyshia" aka "Ketchup"
Please can you pass the Keyshia and mustard?

My HOME-eez are the coolest.

How to Twitter for Twitterphobes & Twitternewbies

I have talked to several people and seen various comments on Facebook lately about not quite understanding the whole twitter thing.
I opened an account a couple years ago, but just recently became active on it. I am really loving it, and I think with a few basic instructions you will too!
You could opt to read the FAQ's on Twitter, but I will just have a few of the need-to-know things here so you don't have to wade through the "advanced" twitter operations. :)

Getting Started
1. Username: Pick a username that you want others to see and recognize.

2. Profile: Use your profile to describe what you will be tweeting about (people will search for certain things, and you want to be found)

3. Personalize: All of your information, picture, page background can be changed under "Settings."

4. Sidenote: Unlike Facebook, you will be searching for and being searched for based on what you have in common with others NOT necessarily because you know them from High School (although you can find people you know as well).

5. Finding People to Follow: Once your account is open, from your "home" page you can click at the top on the "Who to Follow" tab. Under this tab, you can search by the suggestions Twitter gives you (I think these are based on what you have in profile and other people you are following), linking to your Email Contacts, or you can begin browsing by interests categories (News, Art & Design, Family, etc.).

6. Committing to Follow: If you want to follow someone, click the green "Follow" button and you will start seeing their "Tweets" on your homepage. The person may or may not "Follow" you back. Some people have their account set to approve all Follow requests, but most just let whoever follow and it begins immediately.

7. More Searching: Another way I like to find people is to put a subject up at the top in the "Search Box." It will bring up a whole list of Tweets with that subject in it, I'll check out the Tweeter a little and decide if I want to follow.

8. Homepage: Now everytime you log into Twitter, it will pull up your "Homepage" where a live stream of Tweets (Status Updates) are shown from each person you are following.

Now you're ready to...

Start Tweeting (Creating your own "Status Update" in Twitter):

1. Length: You have 140 characters to say what you're going to say. Twitter has a countdown right below the box you type in and it won't let you click "Tweet" if it is too long. You can get creative!

2. Followers: Once you have Tweeted, anyone who is following you can read your tweet live. (Most people have the Twitter App on their phone and check tweets as often as they play "Angry Birds"...this is part of why news about Osama Bin Laden was so quickly spread...who wants to wade through everyone's Frontierville statuses on FB to find out that information?)

3. Tagging (#): You can tag key words in your status and Twitter picks out trends based on how many people are tagging the same word. This is done by putting the # symbol in front of the words. For example, for this post I might tag #howtotwitter. People can also search tags in the Search area similar to searching by subject like I talked about earlier.

4. Retweet: When someone you follow writes something you want to share with others, you can "Retweet" what they say (similar to "Share" on FB). There are button choices between each Tweet, if you mouse over it will tell you what the button stands for. One of them is "Retweet." When you retweet, it will take that person's tweet and become part of your stream of tweets but it will put RT @personname in front so others know you didn't steal the thought but you are giving credit. You can add your own comments if there are enough characters left. It's always a good idea to leave a few characters open on your own tweet in case others want to RT you!

5. Reply: If you simply want to Reply to something another Twitterer as posted. Click the reply button below their Tweet and it will create the @ symbol with their profile name behind it i.e. @homeplussome. Again, add your reply and will show only that person and anyone else you commonly are followed by.

6. Mention (@): Similar to Reply, but you are just mentioning another Twitterer. You may say something like" "I just saw a clever blog written by @homeplussomething, you should check it out." You can check if you've been mentioned by clicking on the "Mentions" tab on the top of your Homepage. The Mobile Twitter App notifies you when you are mentioned.

You're all set to start twittering. Next post, I will tell you how to link Facebook and Twitter together to save time. But for now, start Tweeting! (And don't forget to come follow me on twitter and give this blog a mention!)

Thursday, June 16, 2011

{Thrift Store Thursday}

It's sorting day again at the New Image Thrift Store. Here are my finds today:

Shoes: $1.00
Photobucket

Journal: $0.75
Photobucket

Vintage 1950's Dress: $1.00
Photobucket

Vintage Apron: $2.00 ; Vintage Sheet (fringe not pictured): FREE
Photobucket

Total Spent: $4.75

Goat Cheese with Recipe

I've done my share of trial and error with cheesemaking...mostly error. What I have found is that making Goat Cheese is nearly fail-proof. I have failed, but I have about an 8 out of 10 success rate compared to 1 out of 10 for mozzerella.
In our home, we've been using a lot of store bought Goat Cheese lately and when my supplier down the road showed up with Goat Milk out-of-the-blue, I couldn't resist turning it into yummy Goat Cheese.

Photobucket


I love this book "The Home Creamery" by Kathy Farrell Kingsley about making all of your own fresh dairy products. It has several Goat Cheese Recipes to pick from. I wish I could say I make all of my own dairy products, but I am a busy gal. I am proud to say I could if I had to. I've made yogurt, cottage cheese, sour cream, and various forms of soft cheeses that I'm not sure into which category they would fit.

For Real Though, Goat Cheese is REALLY easy to make at HOME. Here's how I do it:

You will need:

2 Quarts Gallon Goat's Milk
1/2 Cup Apple Cider Vinegar (White Vinegar or Lemon Juice works too)
2 Quarts or bigger Saucepan or Stockpot
Cooking Thermometer
Cheese Cloth
Strainer
Bowl to fit under strainer
Salt & Desired Seasonings


Directions:

1. Pour Goat's Milk into Saucepan and let set until room temperature if you don't have time to mess with it right away. The batch I just made sat out for a day befre I was ready to get to it. Don't freak out. See future instructions about making cottage cheese and sour cream.

2. Heat Goat's Milk to 180 degrees and turn off heat.

3. Pour in vinegar and give on quick stir.

4. Let set until cool enough to pour (curds should form and seperate from whey).

5. While milk is cooling, cover inside of strainer with Cheesecloth and place over bowl.

6. Once cool, pour curds and whey over the strainer with cheesecloth, catching the curds in the cloth, leaving the whey to drain through into the bowl.

7. Once liquid is completely drained and curds are left in cheesecloth, gather the cloth around the curds and tie them up making it like a bag holding the cheese.

8. Take a wooden spoon/spatula/or something long enough to blance on tall stockpot and place on the tie of the bag and tie a knot to keep it in place.

9. Pour whey into glass jar and feed to pets or save for other recipes, smoothies, etc.

10. Hang bag over stockpot for a couple hours or overnight if you don't want to deal with it.

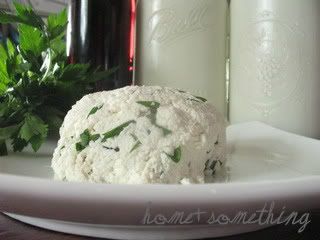
11. Remove cheese from cloth and add salt (about 1 tsp) and other desired seasonings. The cheese I have pictured has garlic, salt, pepper, and fresh Italian parsley.

12. Cover and refrigerate, or eat fresh!

Nothing is better than Homemade, Home Cooked WHOLE foods.

Wednesday, June 15, 2011

Hometown Talent

Photobucket
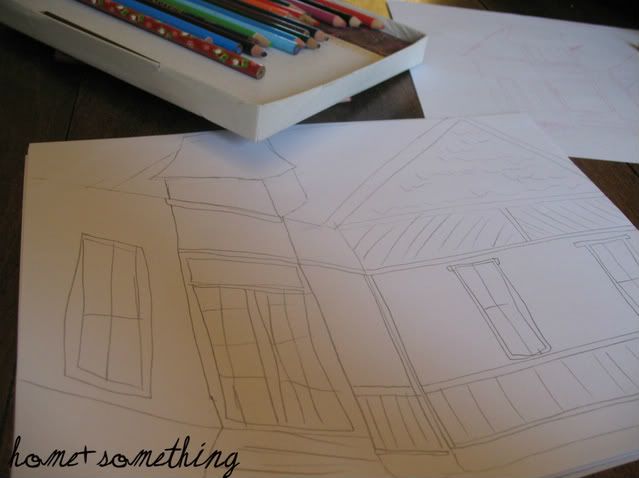
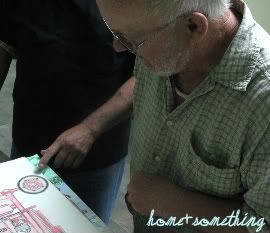
Over the last few years of volunteering at the "New Image Thrift Store," I've had the pleasure of getting to know a Hometown Boy name Larry Levin. He is a funny man who struggles a bit socially, but is very sharp at remembering the history of our town and everyone who has lived there. He loves to stand and chat about the "good 'ol days" and "engines." He talks way over my head in regards to cars, trucks, motorcycles, and tractors. And he's been known to be the first customer in the door and the last to leave (after he takes his bored brother home and comes back). He has mentioned that he likes to draw cars and other things with engines in them. We've been telling him for a couple years now to bring some drawings in so we can take a look. Well, I'm proud to announce, we finally got to see the "Talented work of Larry Levine." The drawing pictured at the top was something he got from the back of a cereal box.
Photobucket Photobucket
Photobucket

His talent is looking at any picture and copying it to perfection. He does not trace, and he does not use a machine to make them bigger. He explained his process of starting in the corner at the bottom and slowly working his way up. He uses a ruler for precision and is hoping to get a set of 36 colored pencils instead of his current 12.

I was so glad I brought my camera on this special day to capture this Hometown Talent.