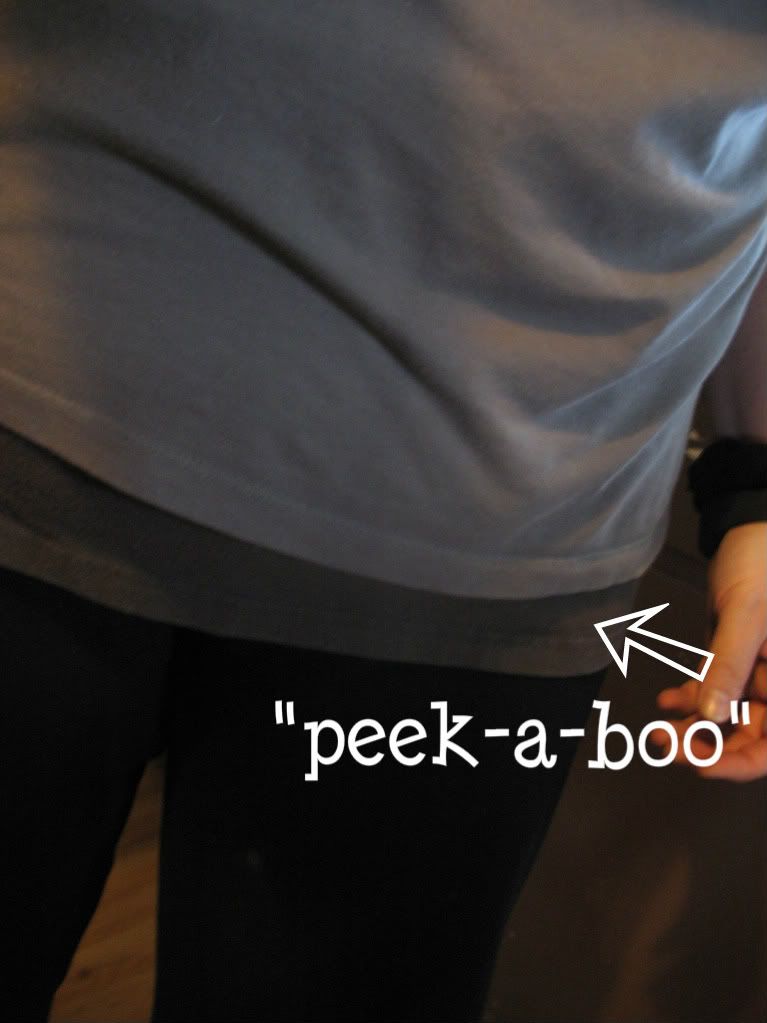
So I've been seeing reviews on the Blush T-shirt Extenders EVERYwhere. I haven't been able to get them out of my mind, soooooo it was time to put my sewing machine to work and recycle some t-shirts in my drawer that have seen better days....been the star of many plays...not really...that's song lyrics.
What is a t-shirt extender?
It is a little something you wear under your shirt to give the APPEARANCE of an extra t-shirt peaking out underneath.Why a t-shirt extender?
- Add a t-shirt without adding extra layers
- Wear shorter shirts modestly
- Extend the life of a shrunk t-shirt by wearing it with an extender
- For gals that are as endowed as I am in the top area of my body...shirts lose length because of it and this is just the answer!
Anyway, being the thrifty, frugal, wife of Mr. Spends-A-Lot, I'm always looking for ways to hold onto our budget. I will admit when I saw the t-shirt extenders are available in Target stores, I did search for them with full intention of buying myself a set. Too the joy of my wallet, our local Target does not carry them.
So began my determination to recreate the t-shirt extender. Here's how I did it and here's how you can do it too!
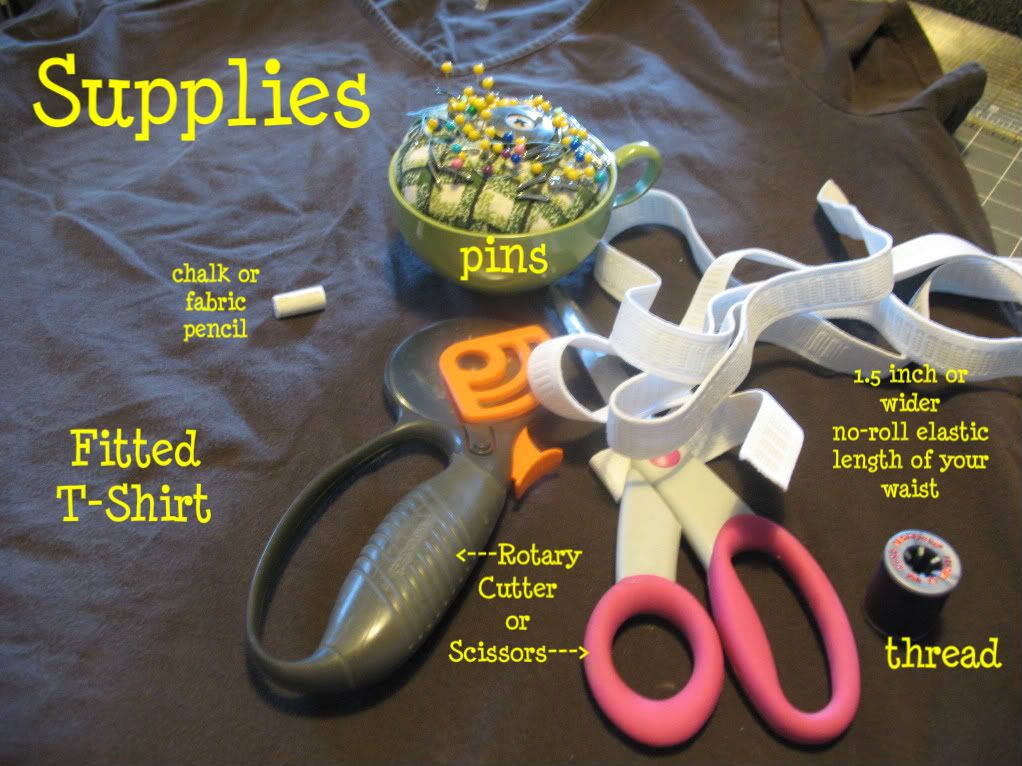
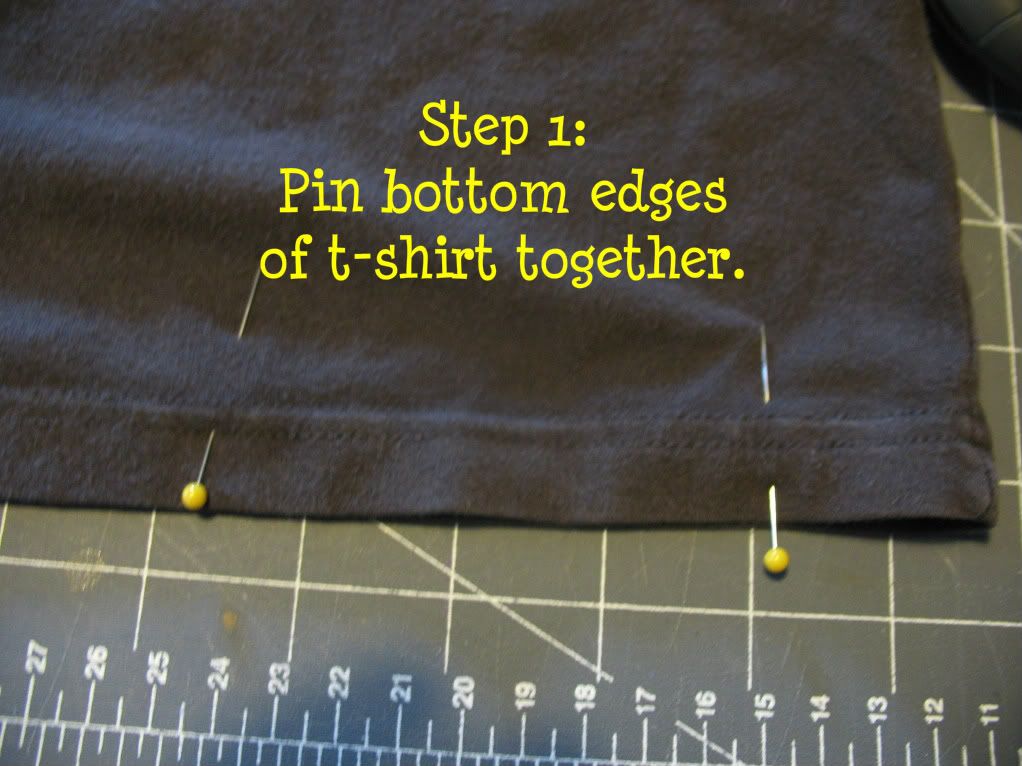
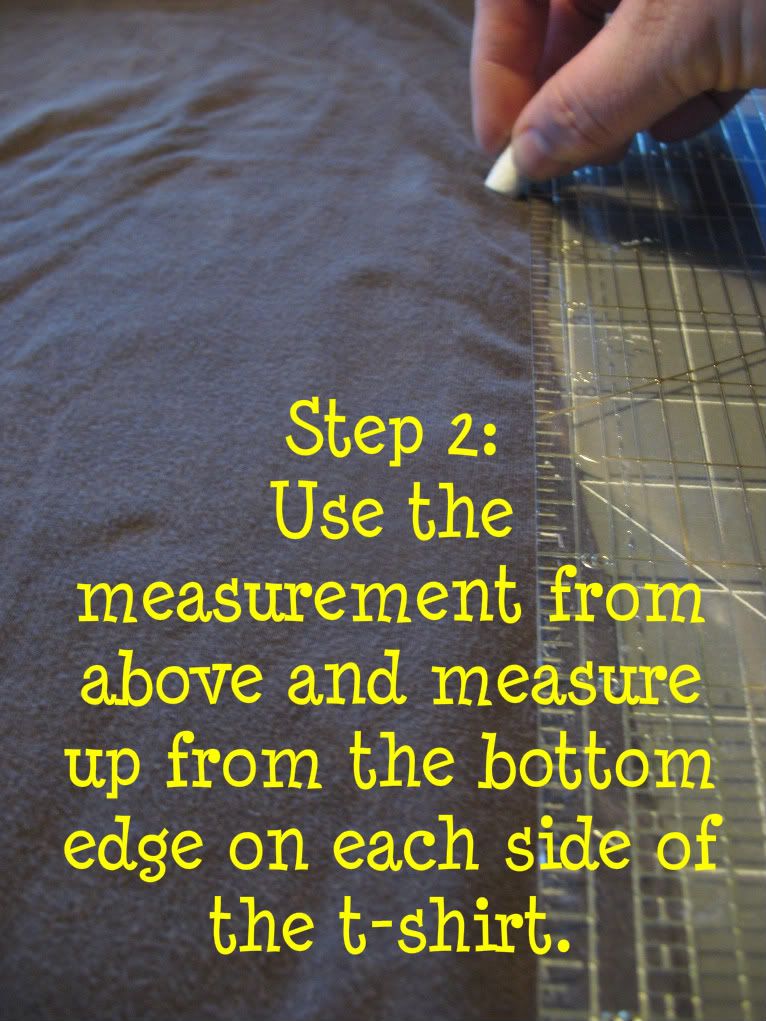
Now here's how you determine the next measurement:
FIRST: Decide how you will wear your extender: At the waist, right below the bust-line, or somewhere in between. Mine will vary depending on the outfit, so I decided to go with a below the bust-line so I have more options.
SECOND: Measure how far down you would like your t-shirt extender to extend from the placement you decided on. I chose for mine to fall right where my hip and leg meet.
THIRD: Add to the above measurement the width of your elastic plus 1/4 to 1/2 inch for seam allowance. My measurement was 9 inches from below bustline to hip/leg connection + 2 inches for elastic and seam allowance=11 inches.

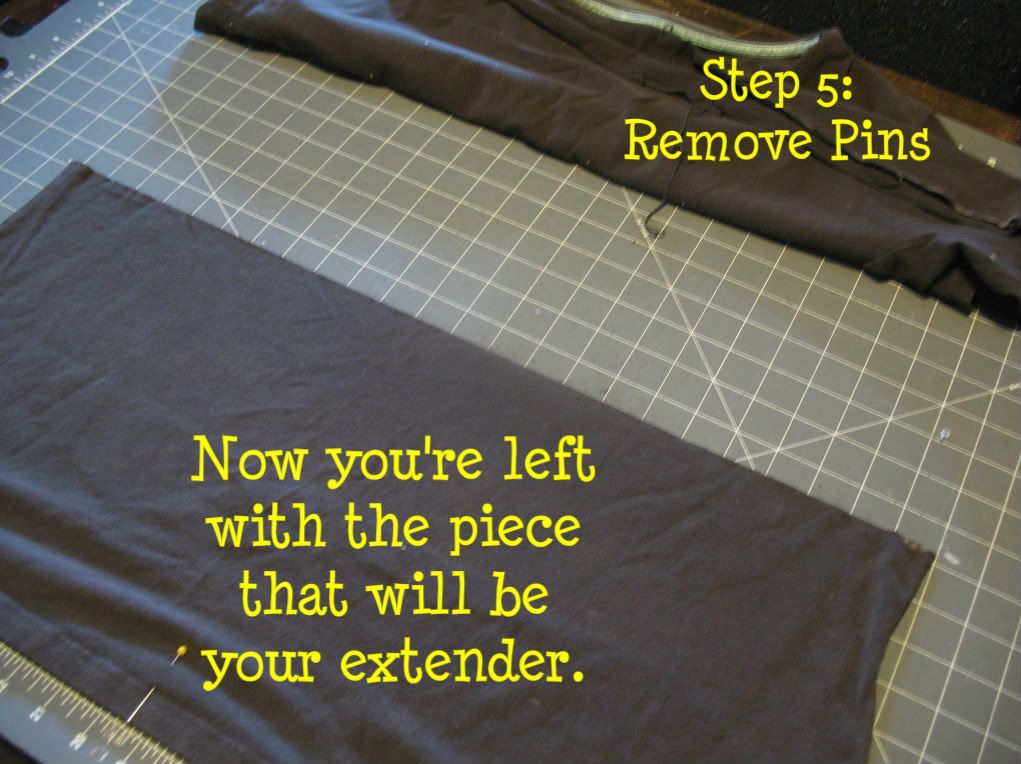
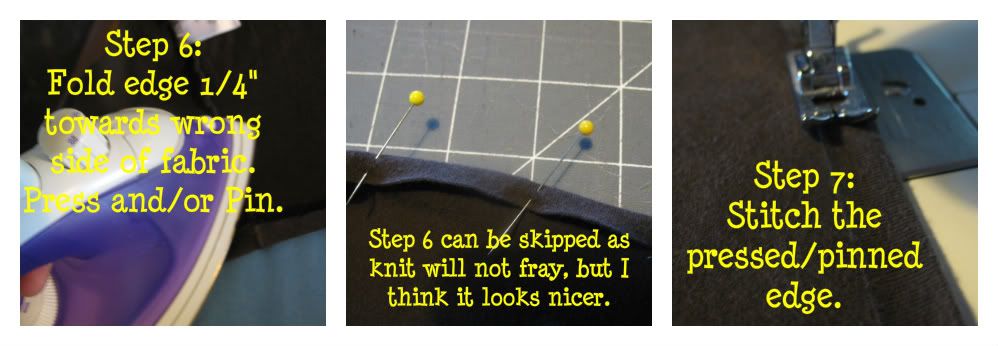
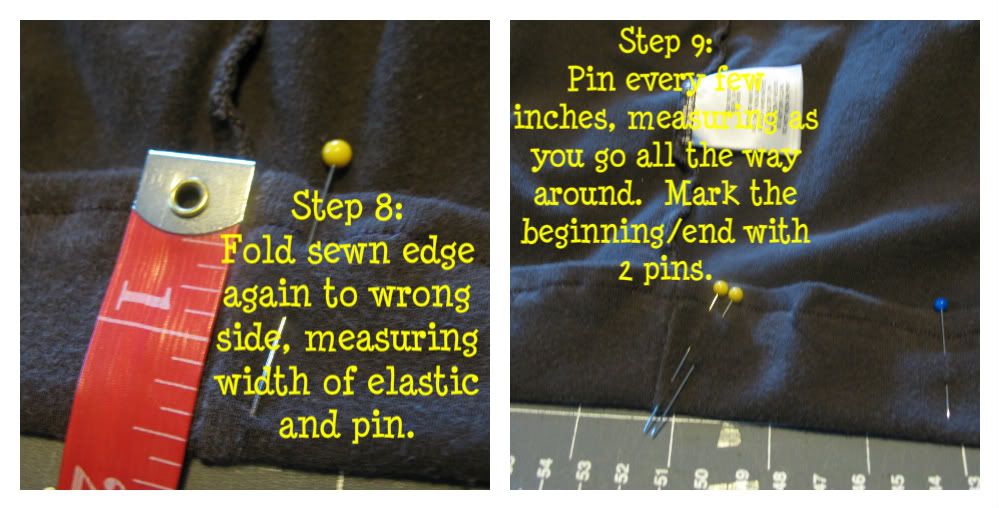
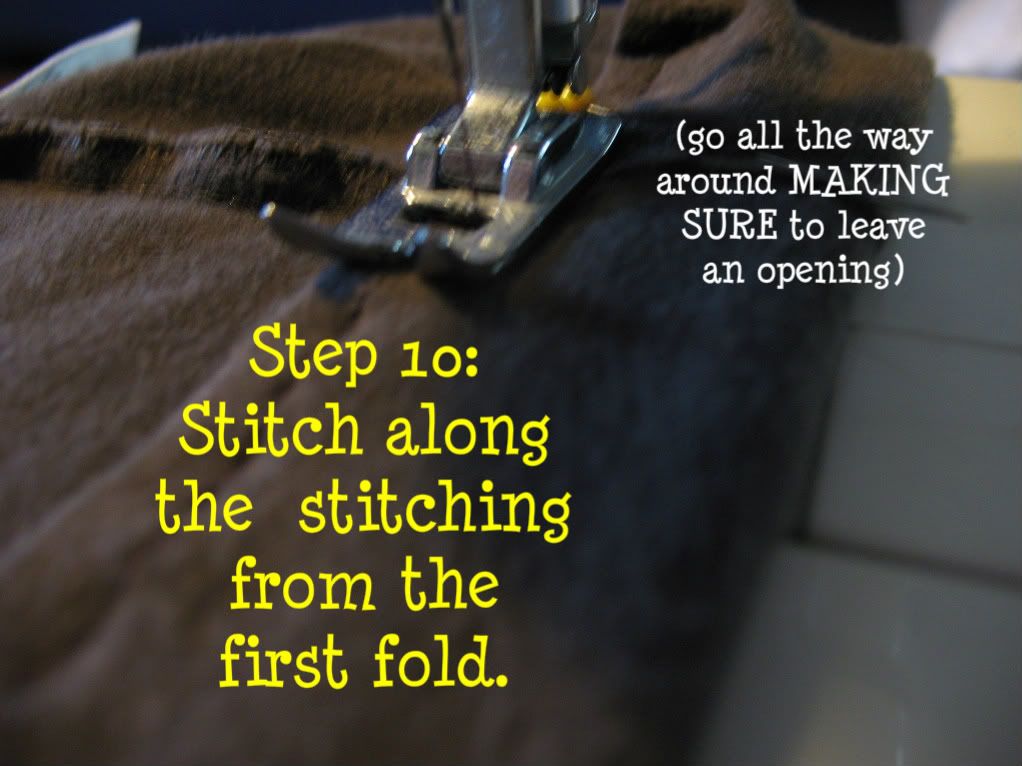
Now it is time to create a waistband. I realize there are a ton of ways to do this, this is how I did it:

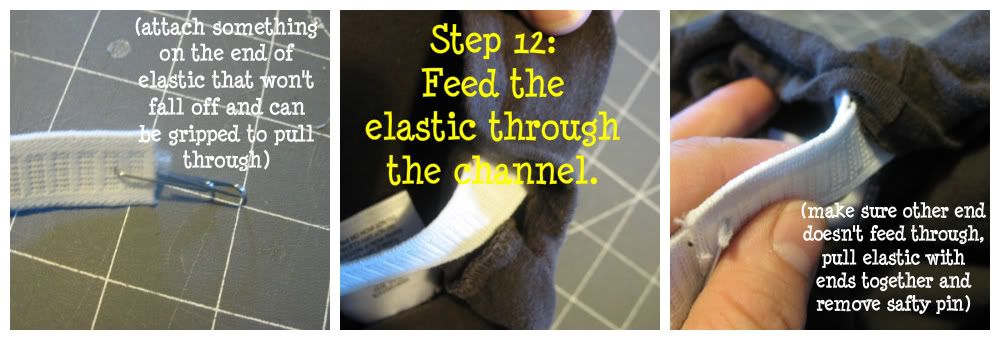
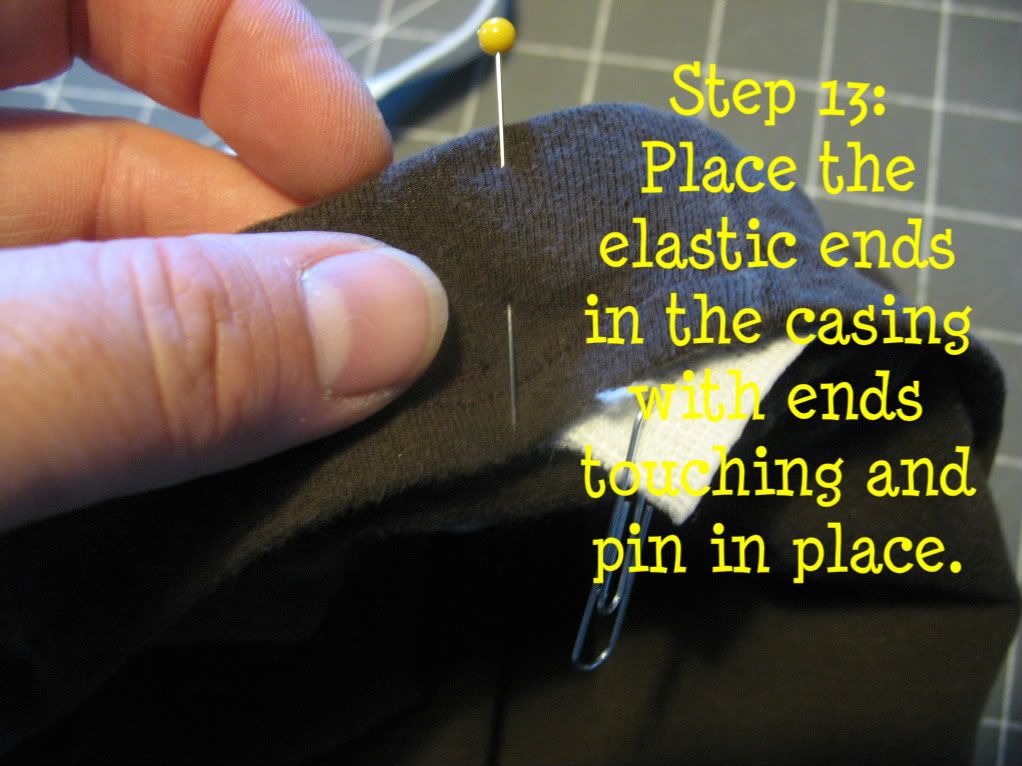
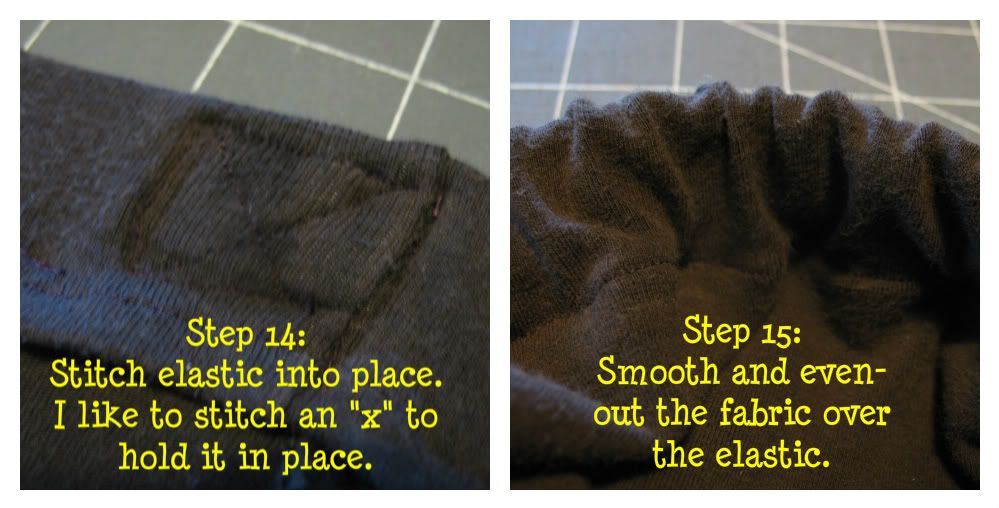
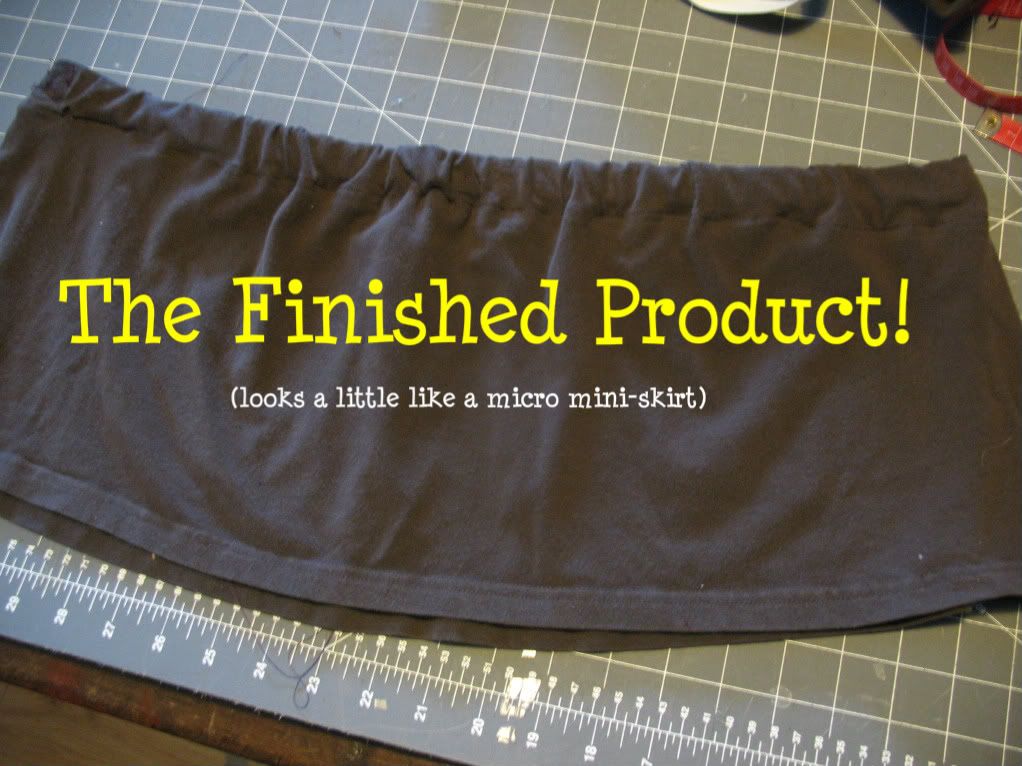
And now for my modeling debut: YIKES!
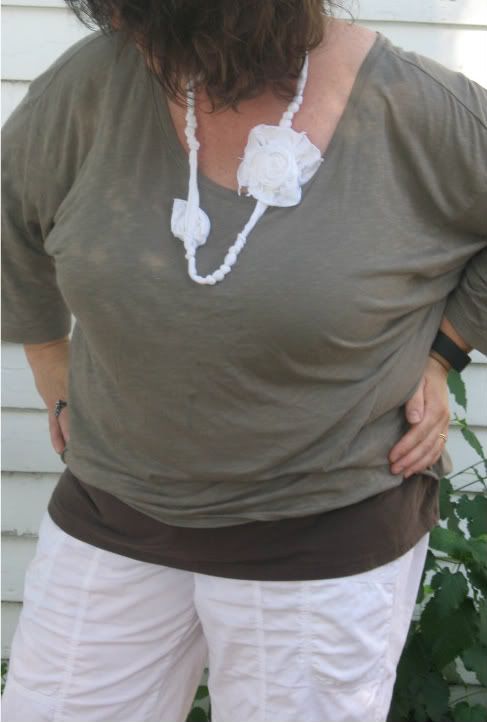

Did you see my Anthropologie Inspired Necklace? I combined tutorials from How Joyful and Little Birdie Secrets for my own rendition.
T-Shirt Extender: $0.25 for the elastic at a yard sale
Shorts: Old Navy $1.00 Thrifted
NOTE: Since I posted this in July, I have had almost 400 visitors stop by and take a look. If you found this tutorial useful, please comment below....I love to hear from my visitors!!
Linking up at:


Enter me in, I think this is an awesome idea!
ReplyDeleteLila
I love this idea! Enter me in the give away as well!! Tshirt extenders look great. I want one!!
ReplyDeleteBuda
Your neclace turnned out super cute, I love it!
ReplyDeleteThanks for following me.
Jessica
http://thatgivesmeanidea.blogspot.com
I made one too after deciding that I didn't need to shell out $ for something so simple:) Great minds think alike:) -Sydney
ReplyDeleteThis is darling! I love your how necklace turned out . . . and I love the T-shirt extender idea!! :) Brilliant! I am bookmarking this for later! Thanks for inviting us over to your blog- I am now your newest follower!
ReplyDeleteCamille @
SixSistersStuff.blogspot.com
I love your t-shirt extender post! I have a similar problem with shirts being too short and this is a great solution (other than wearing a second shirt underneath! Thanks for the idea.
ReplyDeleteHere is a link to one of my favorite recent posts on a DIY Carseat cover for babies! http://momommamoney.blogspot.com/2011/07/sewing-diy-car-seat-cover-canopy.html
ReplyDeleteYour newest GFC follower :) Come follow back!
ReplyDeleteAwesome idea, I will def make some! I didnt want to buy the store bought ones because I wasnt sure of the fit.
ReplyDeleteWOW! what a great idea.. thanks a lots, now ai know what to do with my old fit t shirt :)
ReplyDeletemizz bananaz
Thanks for helping me save some money!!
ReplyDeleteGreat idea! I think the store bought ones are too tight, this is perfect!
ReplyDeleteGreat minds think alike. I also had this idea, I wondered who else thought of this? You thought of it more than an a year earlier than me. ;) Your t shirt extender looks great. warm wishes from Wisconsin, Debby
ReplyDeleteTrendy Womens Tops So I've been seeing reviews on the Blush T-shirt Extenders EVERYwhere.
ReplyDeleteThanks for sharing this tutorial Stacy, I am on the lookout for some of these tips since many of my shirts are somehow have been shrinking in the wash LOL :)
ReplyDeleteI made one of these just yesterday but I made it with an old half slip and cut it just shorter than the hem of my two knit tunics I like to wear over leggings. No more knit clingy and I feel more comfy in my leggings knowing the tunics will stay where I want in the DOWN position!I have the bottom section with lace left and will use this as my short shirt extender... I just have to finish that sections by adding a casing and elastic band :D
ReplyDeleteI think stumble in this post is like miracle cause people around me think im weird for having this kind of idea, so i bury it deep inside my little brain. Now i have the courage to make one after saw you really rock it, awesome, really, love it to the max ❤
ReplyDeleteThis comment has been removed by the author.
ReplyDeletePlease fix your photo hosting, or move you photos to another service.
ReplyDeleteWould love to see your tutorial.
This is great, wish I had found you when you posted it. 7 years later, I discovered tunics and leggings but I lacked the courage to go that short. I had seen the lace on the tunic bottoms and asked someone one day. She kindly showed me hers, I was can make that ;). Walmart has men's tshirts for $5, less than womans, and they are longer,so I started there,1 black and 1 white.
ReplyDeleteHere's the difference, I used their hem for my elastic casing. The first thing is make it fit around you properly, tight,or loose, it's your choice. Now, all that's left is the new hem. Cut the longest you would want plus 2 inches.
Put it on with the shirt that you were making it for originally, decide for this top how you want it done. If you want lace, pick and prepare to apply it in a few minutes. If not,serge or zigzag the edge, turn it up the chosen amount, press and sew, done.
If you are adding lace, I hope you have been choosing what lace you want while I was talking to the others. The first thing to do is measure and cut off the 2 inches of fabric you had added for the hem. Lace has a right and wrong side, once you have found it, fold a tiny bit under to the wrong side, and place this fold, face side down on the seam of the shirt. This gives you right sides facing, and you are going to be sewing with a 1/4 inch seam. Now that you are almost to the end, stop. Loosely measure how much you need to reach the end plus 1/2 inch and put a pin in it. Check accurately to be certain that you have enough lace, you will want to kick yourself if you get to the end and find yourself short by an inch. Remembering the added 1/2 inch, cut your lace, turn under that bit, and sew down. Enjoy :)
Isn’t it awesome? It’s 2022 now, almost 2023, and your post is still here hel-ing the rest of us to be creative also. Thank you!
ReplyDelete